
Shrinking an Oversized Docker WSL2 Virtual Disk
Table of Content
- The Problem: The Expanding VHDX
- Step 1: Clean Up Docker Resources
- Step 2: Stop WSL (The Hard Way)
- Step 3: Optimize the Virtual Disk
- Step 4: Re-enable WSL
- The Result
The Problem: The Expanding VHDX
If you use Docker Desktop with the WSL2 backend on Windows, you have probably noticed your storage space slowly disappearing. Docker stores all its images, containers, and volumes inside a virtual disk file (docker_data.vhdx or ext4.vhdx). While this file grows dynamically as you pull new images, it never shrinks automatically when you delete them.
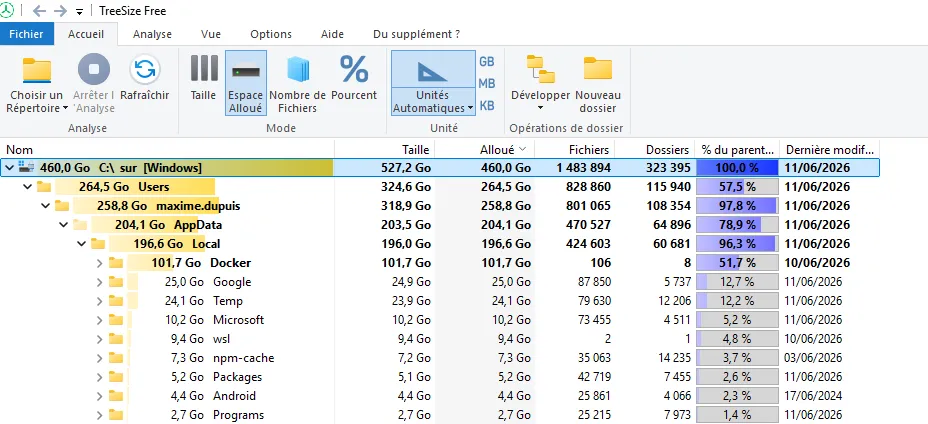
Before starting, my C: drive was running critically low on space. Using TreeSize, I tracked the culprit down to the AppData\Local\Docker folder, which had ballooned to over 100 GB.
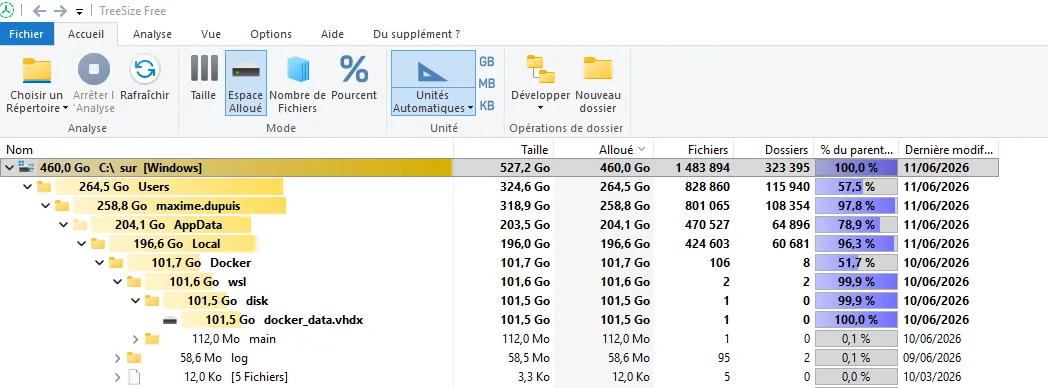
Drilling down further into the wsl\disk directory, it was clear that the docker_data.vhdx file was monopolizing all that space.
Step 1: Clean Up Docker Resources
Before we can shrink the disk, we need to free up space inside the virtual machine. First, let’s check how much space Docker is actually using versus what can be reclaimed.
Run the following command in your terminal:
docker system df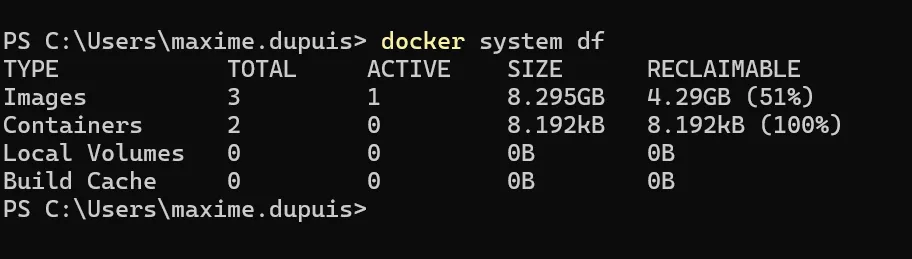
To aggressively clean up all stopped containers, unused networks, dangling images, and unused volumes, run:
docker system prune -a --volumesWarning: This will destroy all local data in your Docker environment that isn’t currently running.
Step 2: Stop WSL (The Hard Way)
To compress the .vhdx file, WSL must be completely turned off so the file is no longer locked by Windows. The standard way to do this is by running:
wsl --shutdown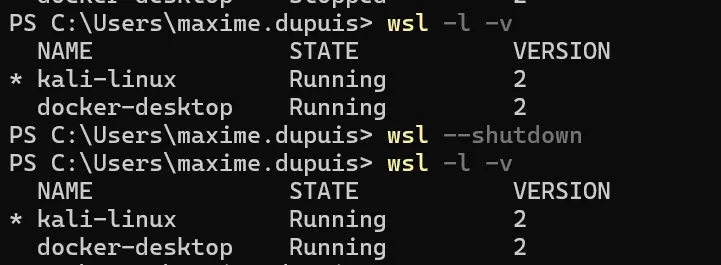
However, wsl can sometimes hang or fail to shut down properly, leaving your disk locked. If you run wsl -l -v and your instances are still marked as “Running,” you will need to force the issue.
The Workaround: To completely release the lock, we can temporarily disable the WSL feature in Windows. Open PowerShell as an Administrator and run:
Disable-WindowsOptionalFeature -Online -FeatureName Microsoft-Windows-Subsystem-Linux -NoRestart
Note: You can skip the restart for now since we will re-enable it shortly.
Step 3: Optimize the Virtual Disk
With WSL completely stopped and the file lock released, we can use Hyper-V’s PowerShell module to compact the virtual disk.
In your Administrator PowerShell window, run the Optimize-VHD command pointing to your specific file path:
Optimize-VHD -Path "C:\Users\<YourUsername>\AppData\Local\Docker\wsl\disk\docker_data.vhdx" -Mode FullNote: Replace <YourUsername> with your actual Windows profile name.
Step 4: Re-enable WSL
Now that the disk is optimized, we need to bring WSL back online so Docker can function again. Run the following command:
Enable-WindowsOptionalFeature -Online -FeatureName Microsoft-Windows-Subsystem-LinuxOnce this finishes, restart your computer to apply the changes. After rebooting, launch Docker Desktop to ensure everything starts up correctly.
The Result
After restarting, I ran TreeSize one more time to check the damage. The Docker folder dropped from an eye-watering 101.7 GB down to just 17 GB.
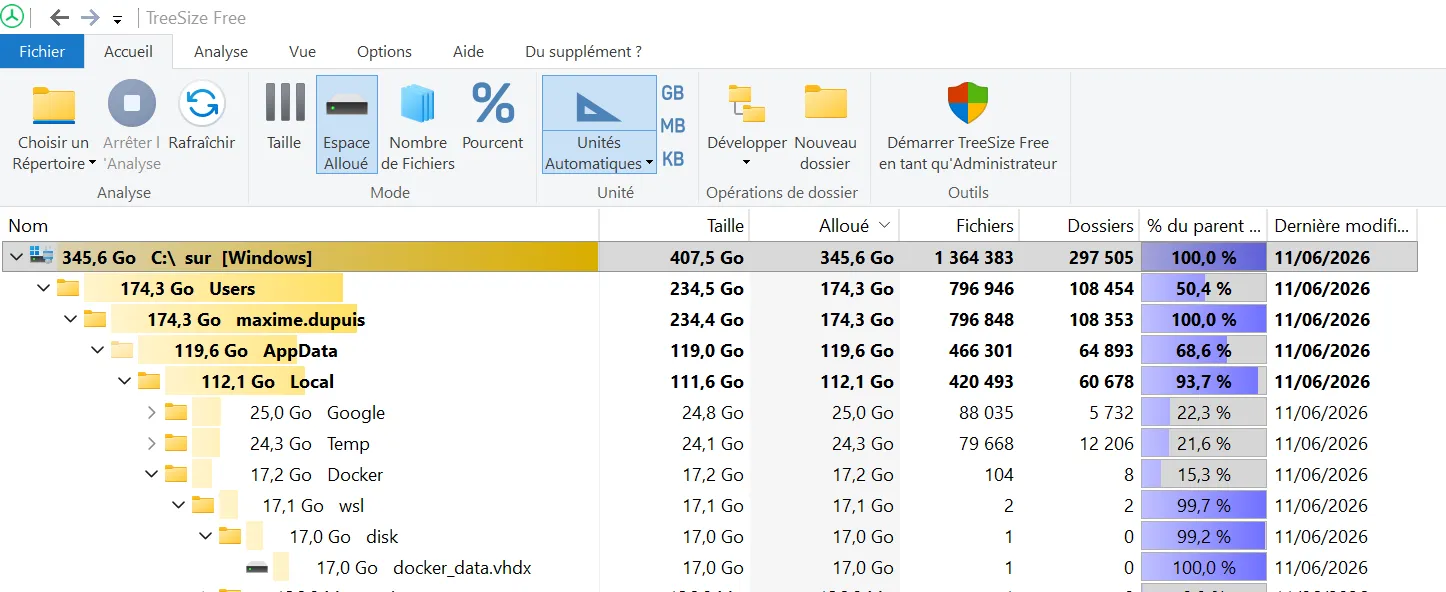
By combining Docker’s native cleanup tools with PowerShell’s VHD optimization—and bypassing WSL’s refusal to shut down—we successfully reclaimed over 80 GB of local storage.